(By Ross Collins, North Dakota State University, updated for CS 2 for the Macintosh)
I. Bridge.
Bridge is Photoshop's effort to propose a photo sorting and viewing option that (it hopes) works better and faster than the software that may have come with your digital camera, or elsewhere. It is a standalone program, but ships with CS2. The idea is that you won't even open Photoshop anymore, but go directly to Bridge, and open all your photos from there. Bridge automatically launches Photoshop when you double-click on an image.
But as the cluster computers probably won't have Bridge immediately available to you, instead of messing about in the applications folder trying to find it, just open Photoshop. Follow tutorial below.
1. From Photoshop's top menu bar, find the wee folder and magnifier icon, right about in the middle. Click to open Bridge.
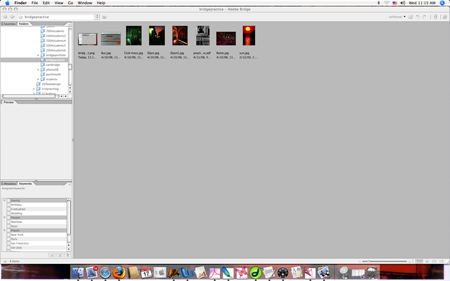
2. Check out the options. The Bridge window includes all sorts of tools that helps you to find, sort, rename, categorize, move and shred your pictures. Well, you can't actually shred them, but you can delete them, much less messy. On right is the thumbnails view. You can change this under the View pulldown menu to filmstrip, details, or, well check it out after choosing a picture folder.
On left are five panels:
3. First job is to open a folder of photos. On a cluster, you either have to navigate (from Folders panel) to a Flash drive or CD, or create your own folder for practice. If you need to borrow some of mine, download these old ones into a folder on the desktop.
Reminder: Create a folder on the Macintosh by clicking on the desktop to display the Finder menu bar, then choosing New Folder from the file menu. Click on the words under the folder to change the name, something like Bridge Practice.
4. In Bridge Folders panel, navigate to the desktop to open the folder. Double click on the folder in the thumbnails window to open. You should see thumbnails of the photos.
5. Check out alternative thumbnail views from the View pulldown. I kind of like As Filmstrip. Note you can also view as Slideshow, similar to the slideshow feature on PCs.
6. Click (in thumbnail view) to bring into Preview panel. Choose Metadata panel to check useful photo properties.
7. You can add a folder to the Favorites panel by choosing it (making sure no thumbnails are chosen) and selecting Add to Favorites from File pulldown. This shortcuts your search in the Folders panel.
8.Sorting: One of the big problems of collecting a few hundred images on the computer is that you're faced with this overwhelming display, sort of like that huge box of 20 years of snapshots in your parents' back closet. But you can sort those photos to manage them--probably those boxes are already sorted naturally by year. You can also sort by vacation, by location, by topic, whatever. In Bridge you sort by labeling, by star and by color, and key words.
9. Select a thumbnail. Or hold down the Shift key to select several. From the Label pulldown, choose a star rating, a color code, or both.
"Gotcha" glitch: you can't add a rating to a photo that's currently open in Photoshop.
10. In the Unfiltered flydown menu at top of bar, choose to display photos you rated. To bring back all, choose Show all items.
11. Change order of your thumbnail sorting by dragging a thumbnail to a new location, or by choosing View and Sort to sort by another criteria.
12. You also can organize your pictures by assigning key words. Choose a photo, and from the Keywords panel, choose toggle on a stock name (remarkably useless, probably) or create your own keyword, by choosing that option from the flyout menu at right of panel.
13. Find your photos later by key word by choosing that option from the Find box, under Edit pulldown.
14. Lastly, open your photo in Photoshop by double-clicking the thumbnail. Isn't this just spiffy? No assignment, but you'll need Bridge to put together your portfolio.
II. Assemble a portfolio.
Okay, now on to some more really cool stuff, of which Photoshop has a plethora (I always wanted to find a use for that word). Most photojournalists nowadays assemble portfolios of jpgs, submitted to prospective employers on a CD for viewing in a web browser, or available directly from a web site. You could do this by hand, but such a chore, not very professional, and you have to know some web coding stuff. Or...you could have Photoshop do the whole thing for you! No webmaster fees required.
What does it look like? Check this out.
1. In Bridge, Assemble the photos you want to use for your portfolio. (Or use the same practice photos you downloaded for the exercise above.) Click to choose each photo you want in your portfolio.
Hold down shift key to choose multiple photos; choose a whole line by just choosing the first thumbnail, holding down Shift, and choosing the last thumbnail.
2. Still in Bridge, choose the Tools pulldown, Photoshop, and Web Photo Gallery.
You can also do this from Photoshop: File pulldown, Automate, and Web Photo Gallery.
3. In the dialogue box, choose a Style. The thumbnail on right shows what each style looks like.
4. Choose to include an email address as a contact if you want.
5. As Source Images, choose Select Images from Bridge, or, if you didn't get that ready like I told you (so many people foolishly ignore my ever-astute advice), laborously rummage through folders using the Choose option.
6. Change Options as you want. The Banner is the headline on your portfolio, so you'll want to personalize that. You can leave the others as default. Be sure to leave the General extension as .htm or it won't show in a web browser. Under Large Images, you might want to set quality to high.
7. Destination will save the portfolio in the folder you specify. In this case, choose the Desktop. Or, before Okaying, create a new folder on the Desktop or another drive to save your portfolio.
8. Choose OK. Wait while Photoshop whips your portfolio into shape. It should open automatically in the computer's default browser. Tah-dah!
Photoshop creates several files to make this work. One is labeled Index. That's what you click on to open your portfolio. Others have extensions as chosen in Options, images, and thumbnails. While you just put 'em on the desktop for now, in real life you'll want to save them all in one folder, so the links won't end up broken.
Assignment: Create a practice Web portfolio, print the index page, hand in for grading.
Quick tip: create a PDF presentation.
The regular web presentation includes several files, and so is somewhat large and unwieldly for, say, sending as an email attachment. If your presentation is fairly small (about 10 images or less), try a more compact alternative, presentation in PDF (Portable Document Format). To see how this works, download this sample of Cambridge pictures. Open in Acrobat. Press Esc to end show.
Note: the transition effects work in Acrobat, but don't seem to work in Macintosh's default Preview.
1. Under the Tools pulldown, choose Photoshop and PDF Presentation.
2. Your open Bridge files will be listed. Choose Browse to add others.
3. The Multi-Page Document Output Option creates one PDF file. The Presentation Option creates a moving slide show, complete with cool transitions you specify under those options.
4. Choose Save, filename, and location.
6. In the Save dialog box, consider options. Most can be left to default, unless you need to specify a higher-quality (and therefore larger) presentation.
Note: If you wish to send this as an email attachment, such as needed for the class portfolio assignment, you probably will have to save as a smaller file. Many email services do not send files over 10 mgs. To make your presentation more compact, in the PDF dialogue box, Adobe PDF Preset window, choose Smallest File Size.
7. On okaying the Save, a PDF file will be created, and should open automatically in Adobe Reader, with the slide show, if specified.
8. Choose the ESCape key to exit the slide show.
Assignment: None, but use this option to create a presentation of your final portfolio assignment.