Title

Between-field Tillage and Planting Equipment Clean-up and Sanitation

(W2099, June 2024)
Other Authors

Meaghan Anderson, Iowa State University Extension
Kevin Jarek, University of Wisconsin-Madison Extension
Angie Johnson, North Dakota State University Extension
Wayne Ohnesorg, University of Nebraska-Lincoln Extension
Brian Luck, University of Wisconsin-Madison Extension
Tilth Agronomy LLC

Availability
Availability:
Web only
Publication Sections

Why Clean Agricultural Equipment

There are several reasons why producers should clean and maintain their tillage and planting equipment, including field cultivators and planters:

  • Maintenance. The accumulation of mud, weeds and debris can harbor problems easily identified on clean equipment. Cleaning equipment to perform regular maintenance and reduce risk of downtime during the spring planting season makes good financial sense. Equipment that has been properly cleaned and maintained usually results in more efficient field performance. In addition, higher resale or trade-in value is often associated with equipment that has a track record of regularly scheduled maintenance.
  • Movement of weed and disease issues. Material accumulated on tillage and planting equipment can easily move pathogen-infested soil and weed seed from contaminated fields to clean fields.

Prevention is Crucial to Pest Management

Tillage and planting equipment often visit both owned and rented land, increasing the probability of inadvertently transporting unwanted biomaterial from one field to another. This material may attach itself to sweeps, spikes, row cleaners, press wheels and parts of the frame.

While it is unlikely you will be able to remove 100% of the biomaterial from a piece of tillage or planting equipment, you can reduce the risk of spreading material from one field to another by taking a few minutes to follow these simple clean-up steps:

  1. Remove all plant material, living and dead. Some weed species produce up to 500,000 seeds per plant, and species like Palmer amaranth and water hemp hold their seed very tightly, making accidental spread of plant material likely.
  2. Remove loose clods of soil that accumulate on tires, wheel wells and fenders. Soil transported from one field to another may contain potential weed seed and other pests, such as Soybean Cyst Nematode (SCN). Once SCN becomes established in a field, it cannot be removed and becomes a lifelong management issue for the landowner.

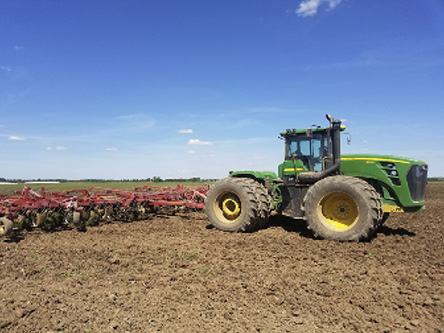
    Tractor
    Photo Credit:
    University of Wisconsin-Madison Extension
    Before the unit leaves the field, assess the situation for risk of transporting biomaterial and soil.
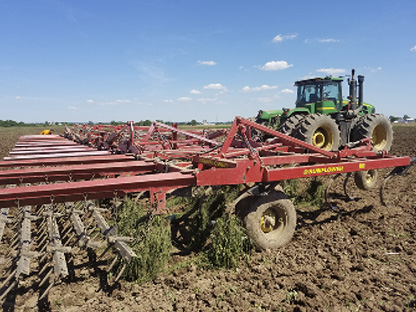
    Tractor
    Photo Credit:
    University of Wisconsin-Madison Extension
    Identify the problem areas before moving on to the next field.
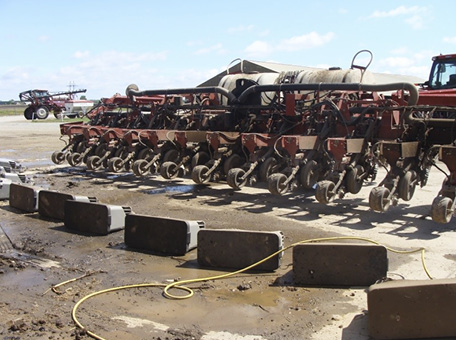
    seed boxes
    Photo Credit:
    University of Wisconsin-Madison Extension
    Remove the seed boxes to effectively clean the whole machine.
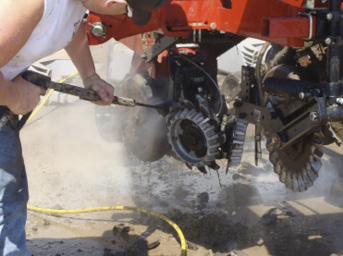
    remove biomaterial
    Photo Credit:
    University of Wisconsin-Madison Extension
    It took about one hour to remove the biomaterial/soil from this 12-unit planter to prevent...
    field
    Photo Credit:
    University of Wisconsin-Madison Extension
    ...a long-term management situation resulting in increased costs and reduced future crop yields.

Guidelines for Power Washing and Sanitizing Tillage and Planting Equipment

Tillage and planting equipment clean-up requires more than simply removing loose material. A thorough power washing and sanitizing will provide additional removal of soil and plant pathogens.

When cleaning tillage and planting equipment, wear personal protective equipment (PPE) to reduce the risk of injury. Hearing protection, safety glasses or safety googles, leather gloves and no-slip shoes or boots are just a few examples of PPE that can prevent high pressure water or flying debris from injuring your eyes, hands and feet. Consult the power washer operators manual before beginning the job.

Follow these basic steps for washing and sanitizing equipment:

Site Selection

  1. Unpaved areas of grass or gravel allow for water infiltration. Medium- and fine-textured soils below the surface can serve as a filter and reduce surface runoff. Always determine what is environmentally appropriate for the site.
  2. Avoid potential contamination. Never wash equipment within 100 feet of a wellhead or drainage tile inlet.

Washing

  1. Choose the correct nozzle or tip for your power washer and hold the unit two to three feet from the surface being cleaned. Presoaking is recommended to loosen material, saving time and water during cleaning.
  2. Save time by working from the top of the unit and making your way toward the bottom to avoid biomaterial, soil and debris running over the freshly cleaned areas.
  3. Use smooth, left to right horizontal motions while covering a three- to four- foot area in one pass. This method increases
    the efficiency of your movement.
  4. If using a cleaner, consult the power washer operators manual for the type and volume of cleaner needed. This will help determine what products are recommended or acceptable, as well as any precautions that should be taken to limit environmental impact.

Sanitation

  1. Use a 1% bleach solution applied via a backpack or deck (pump) sprayer.
  2. Soak surface for 15-20 seconds with solution, then thoroughly rinse to prevent corrosion.
Bleach to mix for
1% solution
Gallons of water required
1.3 oz1 gal
2.6 oz2 gal
3.9 oz3 gal
5.2 oz4 gal
6.5 oz5 gal